
Roasted Garlic and Rosemary Sourdough Bread
This post may contain affiliate links. Please read my disclosure policy to learn more.
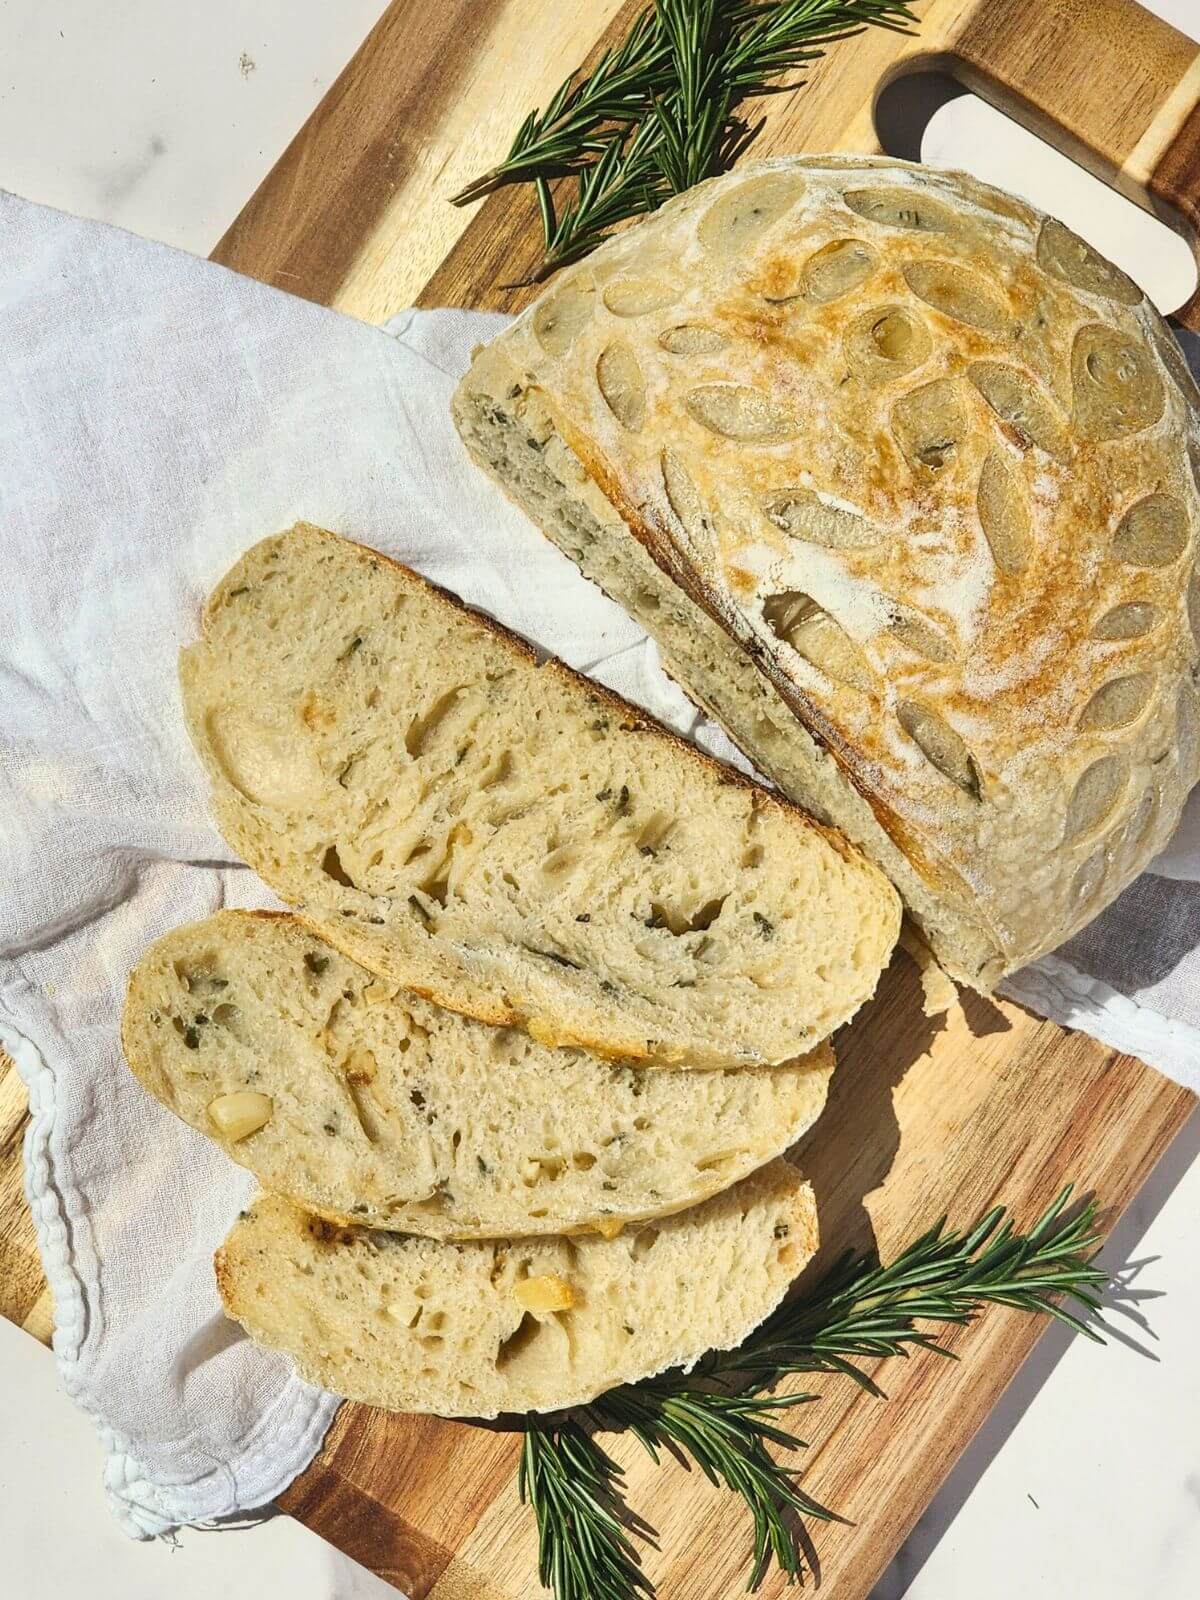
This rosemary sourdough bread is filled with roasted garlic, fresh rosemary, and savory flavor in every slice. The roasted garlic turns soft and mellow, the rosemary adds fresh herb flavor, and the crust bakes up golden and crisp. It’s the kind of bread that belongs next to soup, pasta, Sunday dinner, or just a thick smear of butter.
Recipe Overview: Roasted Garlic and Rosemary Sourdough Bread
⏱ Prep Time: 1 hour
🚨 Resting Time: 1 day
👩🏻🍳 Bake Time: 45 hour
⏳ Total Time: 1 day 1 hour 45 minutes
🍞 Servings: 12 slices
⚡ Calories: 162 calories per slice
🍂 Flavor Profile: Savory and fragrant, with roasted garlic, fresh rosemary, a chewy sourdough crumb, and a crisp golden crust.
👌 Difficulty: Medium. Best for bakers who are comfortable with sourdough fermentation, stretch and folds, and shaping.
💛 Why It Works: This loaf starts with a simple sourdough base, then roasted garlic and fresh rosemary are folded in early so every slice has savory flavor, a chewy crumb, and a crisp golden crust.
SUMMARIZE & SAVE THIS RECIPE ON
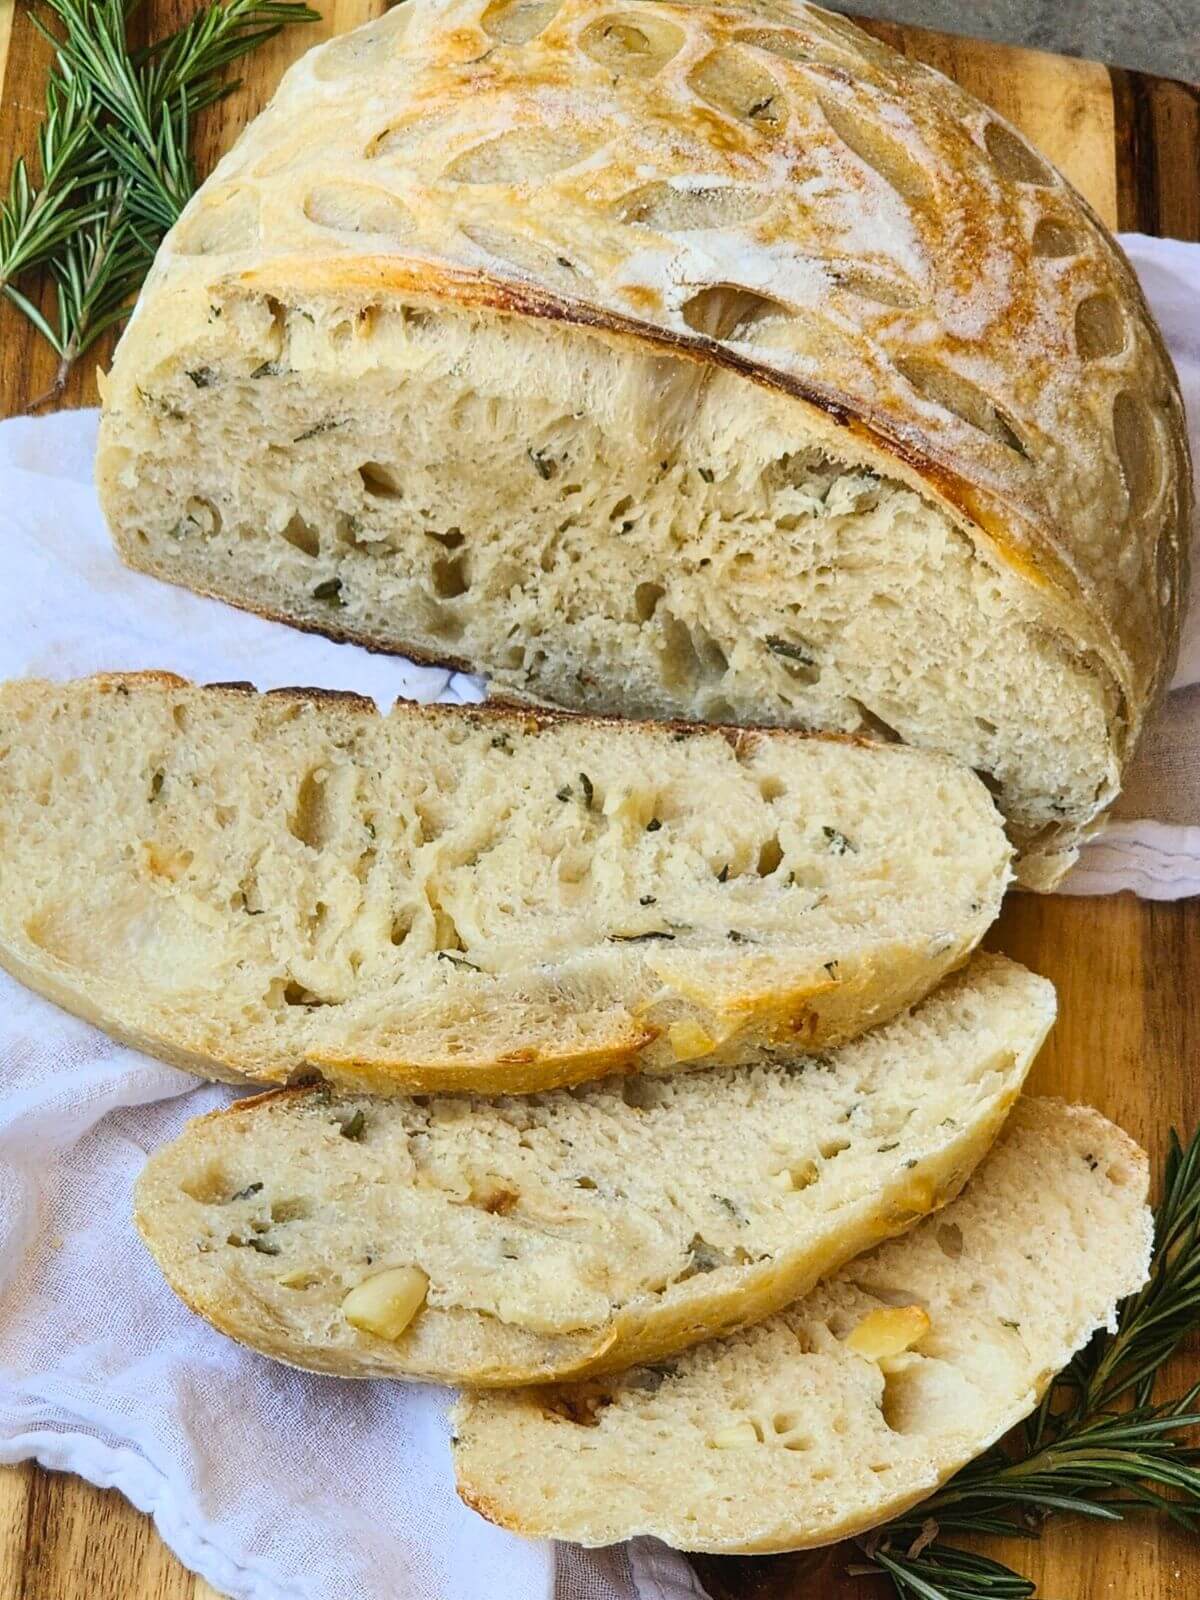
Garlic lovers, this loaf is for you. This rosemary sourdough bread starts with the same base as my plain artisan sourdough bread but gets roasted garlic and fresh rosemary folded in early so the flavor has time to work through the dough. The garlic bakes into soft, mellow pockets, and the rosemary gives the loaf a savory herb flavor without overpowering the sourdough.
Fresh rosemary gives the best flavor here, but dried rosemary will work if that is what you have. This loaf is a nice change from my same day sourdough sandwich bread when you want a crusty loaf with more flavor. It’s especially good with a soup like creamy wild rice soup or a heart dish like smoked meatloaf with cheese.
Why you will love this Roasted Garlic and Rosemary Sourdough Bread
- Savory flavor in every slice: Roasted garlic and fresh rosemary are folded into the dough early, giving the bread more flavor throughout the loaf.
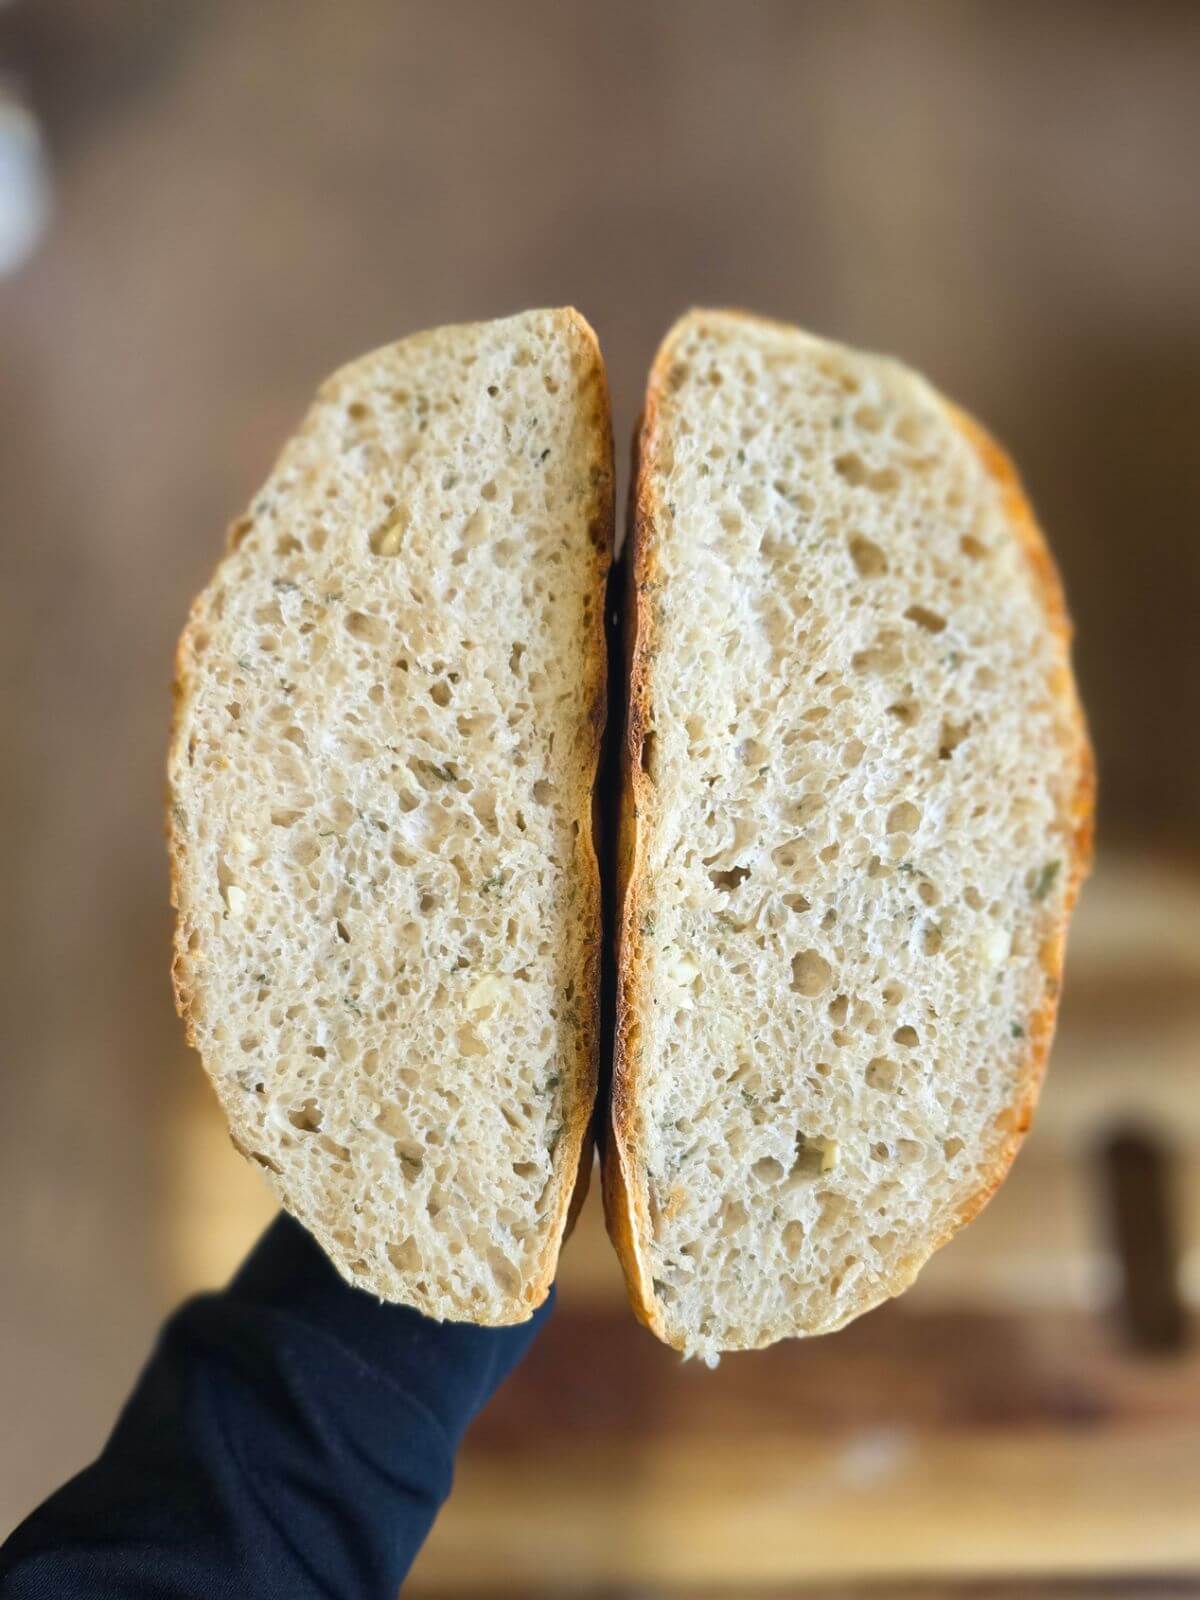
- Crisp crust and chewy crumb: This loaf bakes up with a golden crust and that classic sourdough texture inside.
- Simple ingredients, big flavor: The bread starts with a basic sourdough dough, then the roasted garlic and rosemary make it feel more flavorful and special.
- Fresh herbs make it better: Dried rosemary works, but fresh rosemary gives the loaf the best savory herb flavor.
- A good sourdough recipe to build on: Once you’re comfortable with sourdough, recipes like sourdough pretzels, sourdough croissants, and this rosemary loaf are fun ways to use your starter beyond a plain loaf.
Key Ingredients
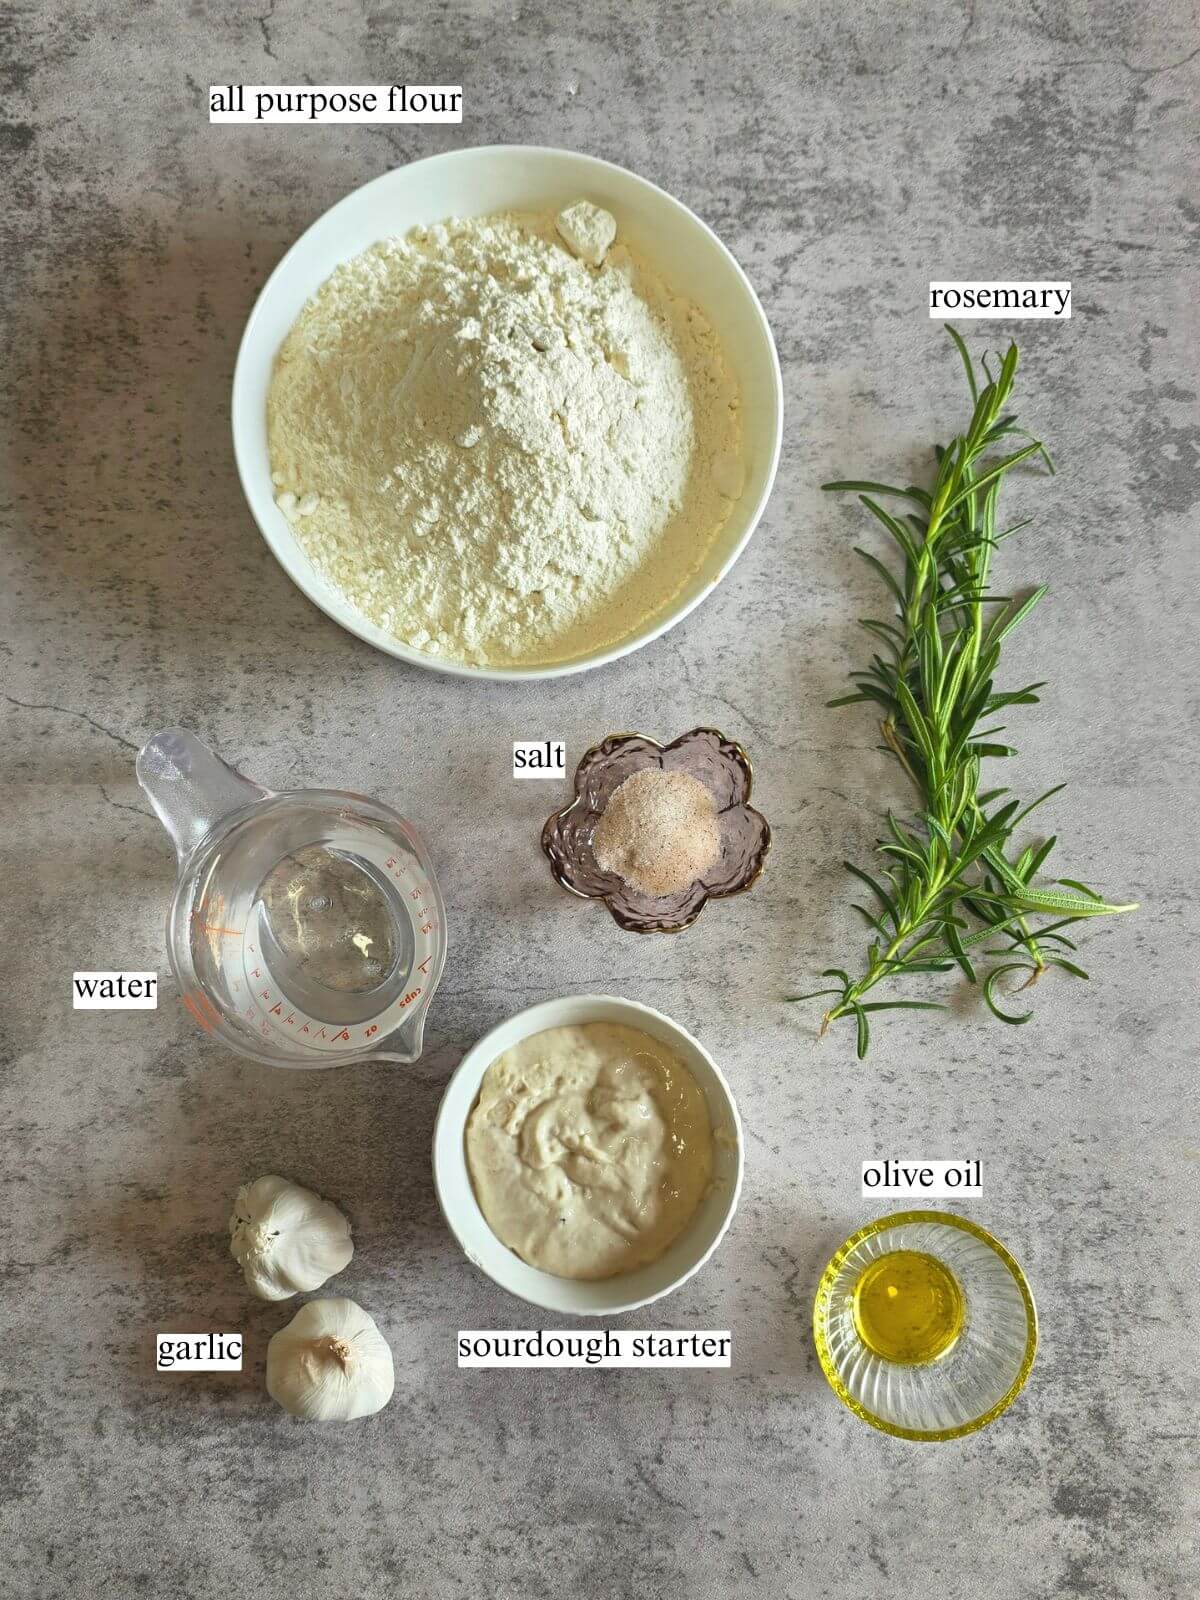
- Active sourdough starter gives the bread its rise and classic sourdough flavor. Make sure it is bubbly and active before mixing the dough.
- Bread flour gives the loaf structure and helps create a chewy sourdough texture.
- Water hydrates the dough and helps everything come together.
- Sea salt adds flavor and strengthens the dough.
- Fresh rosemary adds an earthy, herby flavor that pairs really well with the roasted garlic.
- Roasted garlic gives the bread a mellow, savory flavor without the sharp bite of raw garlic.
- Olive oil is used for roasting the garlic and adds flavor to the loaf.
How to make Roasted Garlic and Rosemary Sourdough Bread
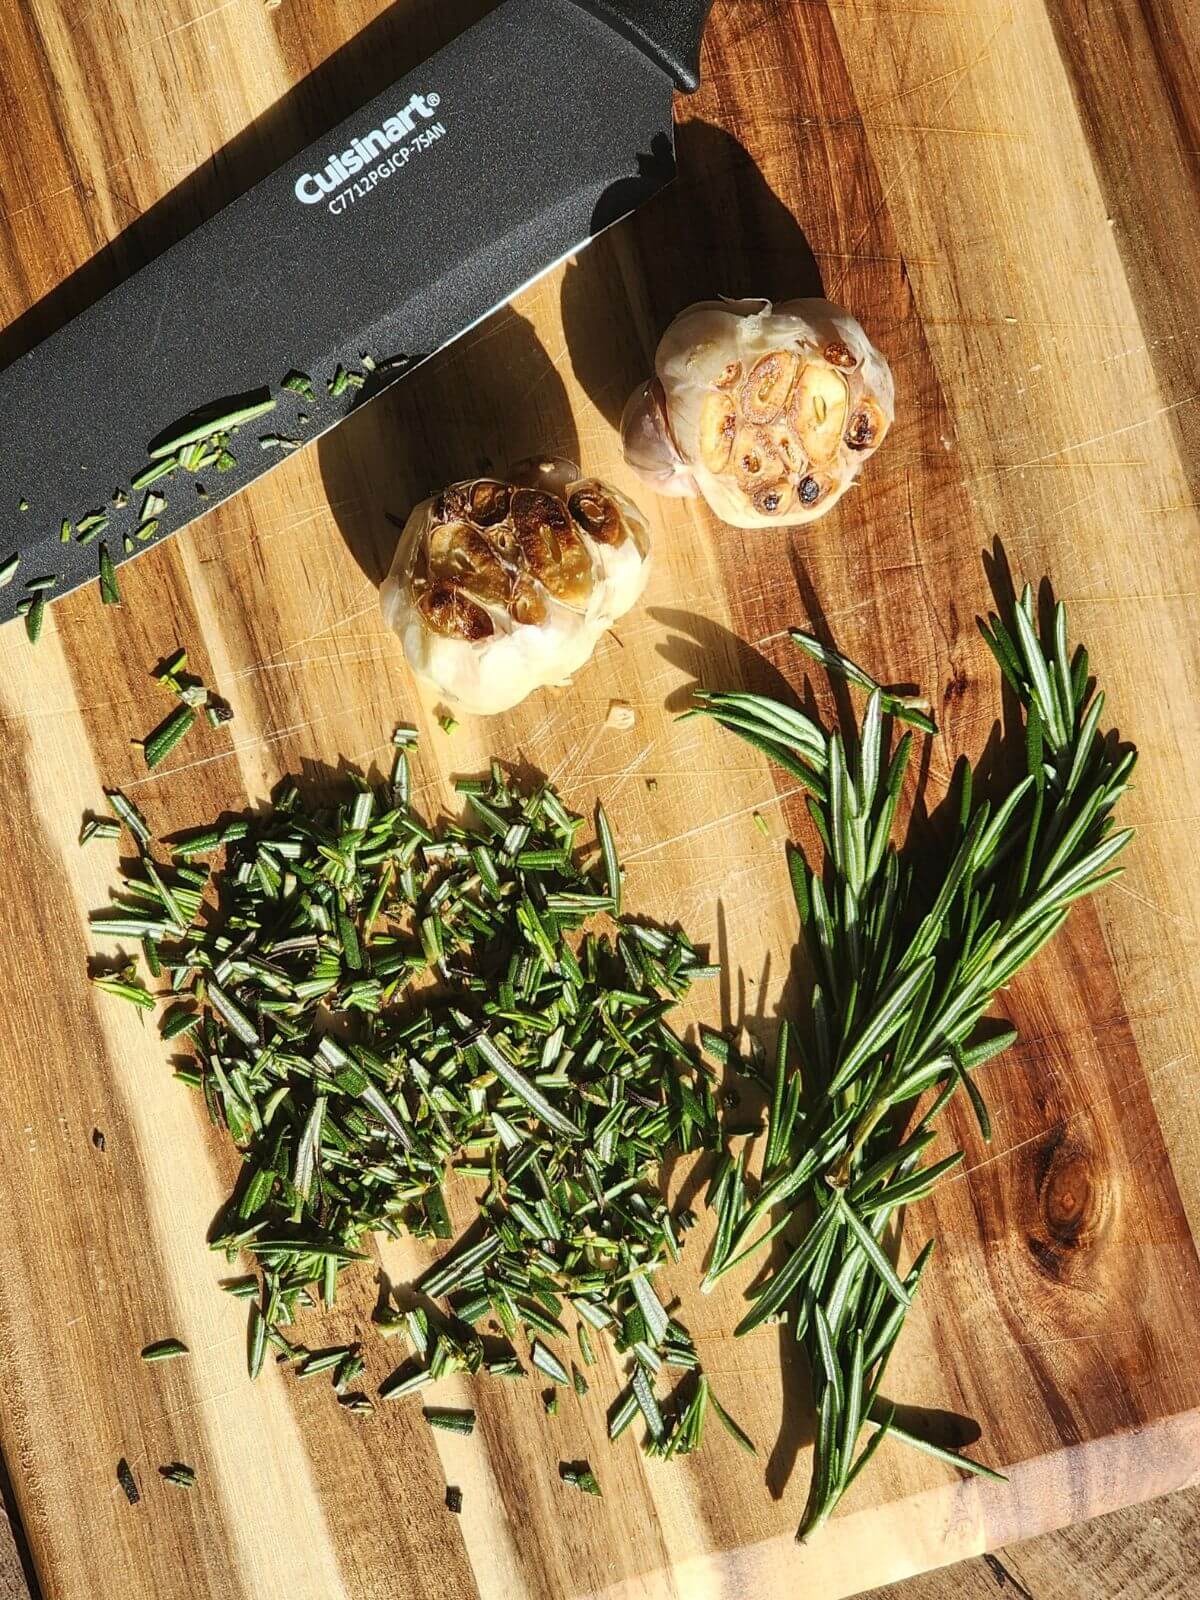
Step 1: Roast the garlic until the cloves are soft and golden. Chop the fresh rosemary and let the garlic cool before adding it to the dough.
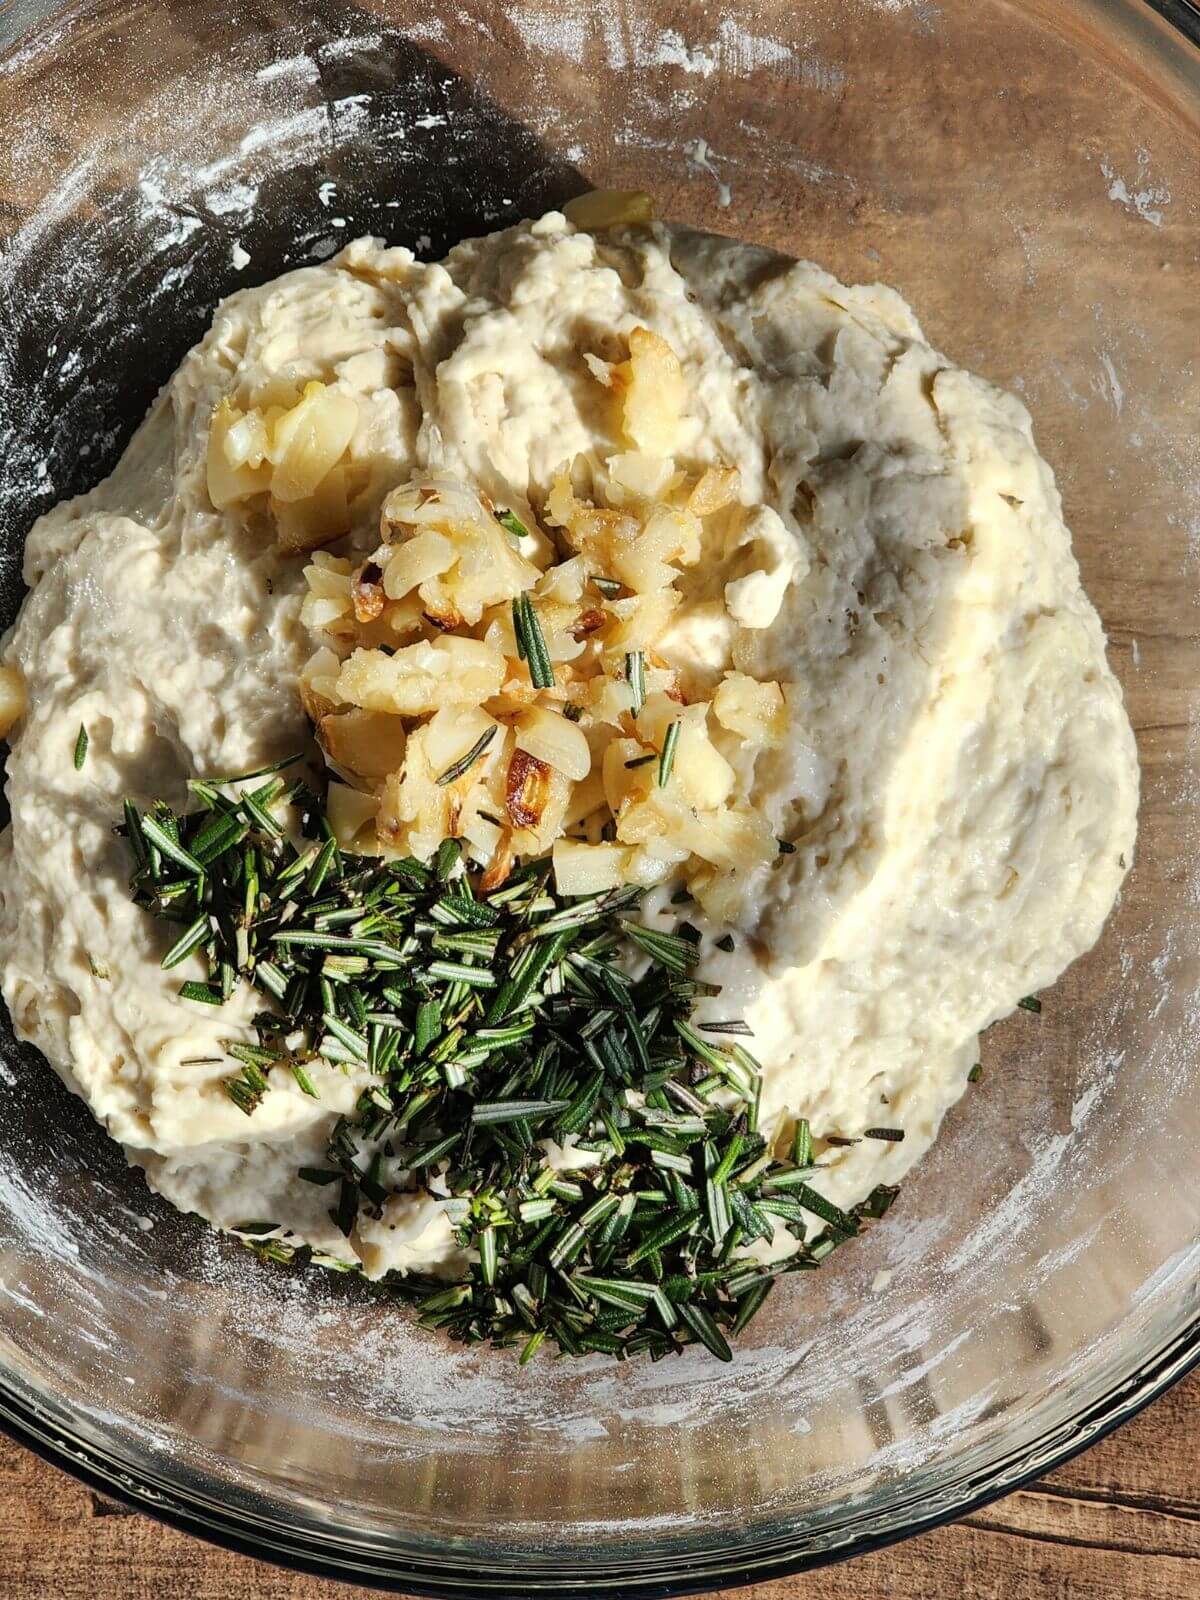
Step 2: Mix the active sourdough starter, water, flour, and salt until a shaggy dough forms. Let the dough rest for 30 minutes. After the dough has rested, add the cooled roasted garlic and chopped rosemary. Fold them into the dough during the first set of stretch and folds.
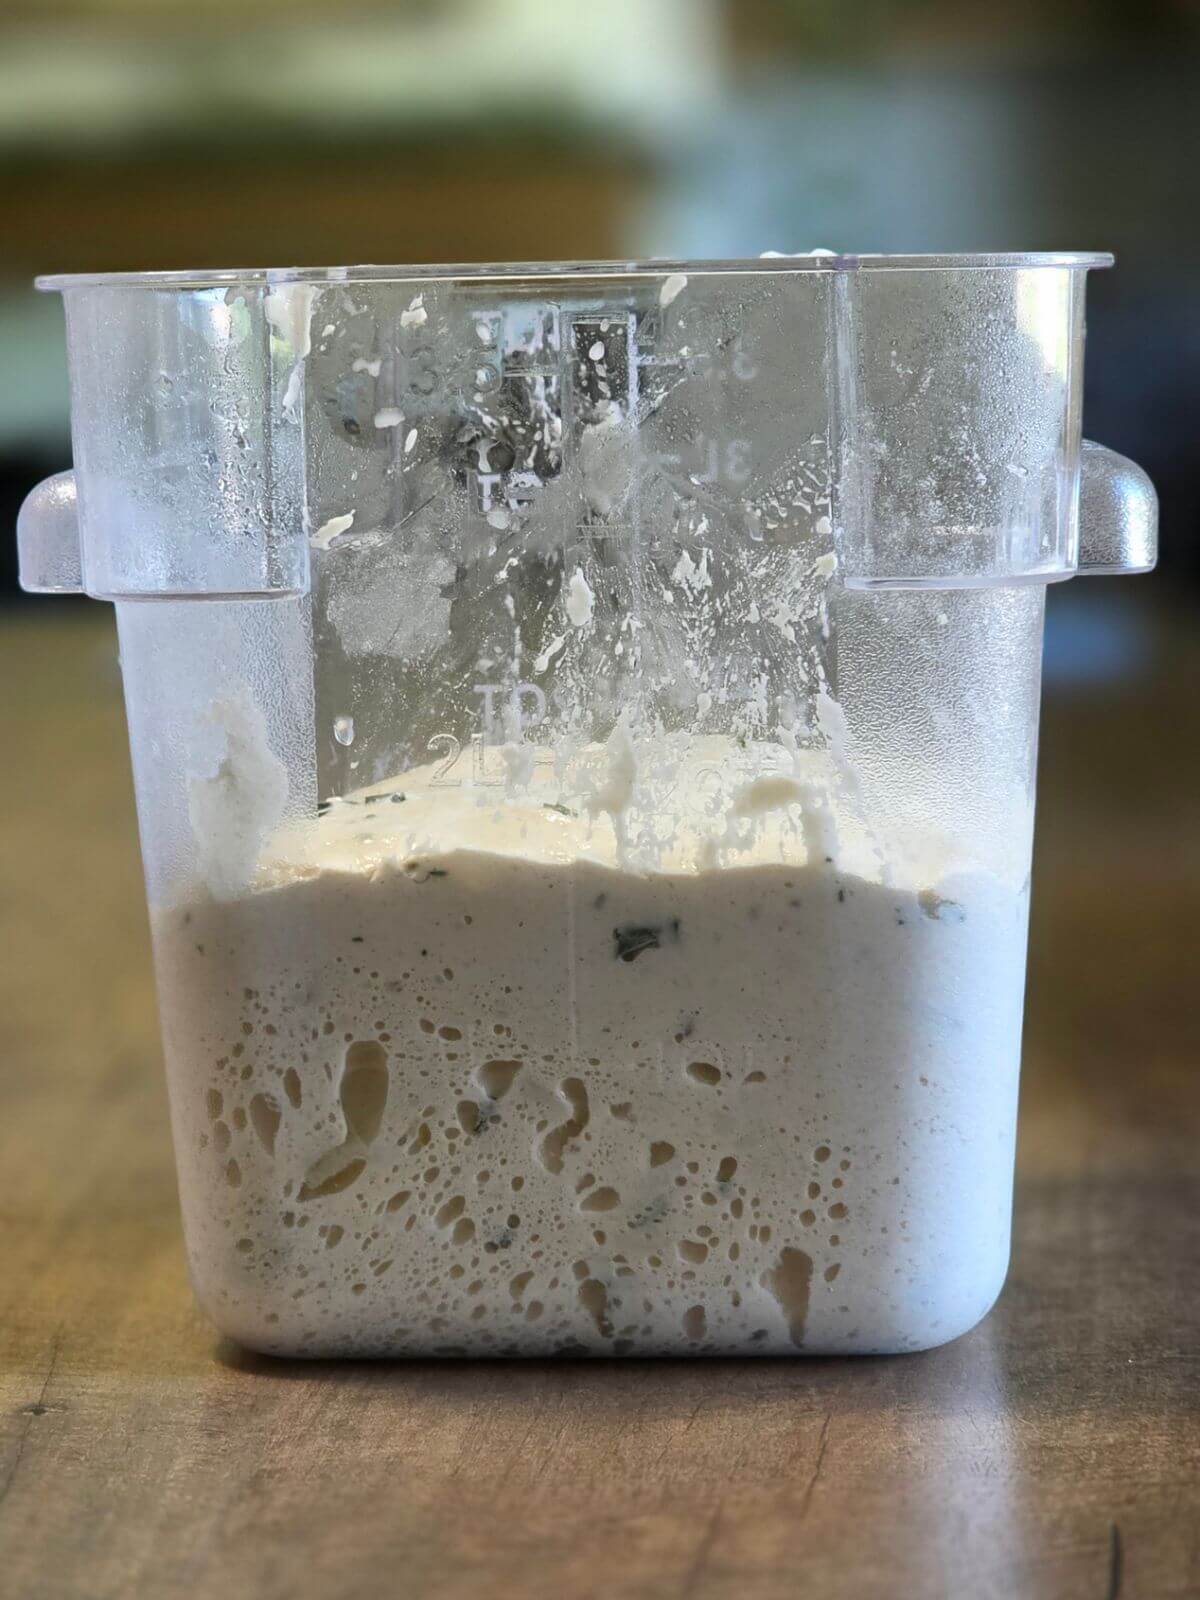
Step 3: Let the dough bulk ferment until it looks puffy, has visible bubbles, and has risen about 50 to 75 percent. It does not need to fully double.
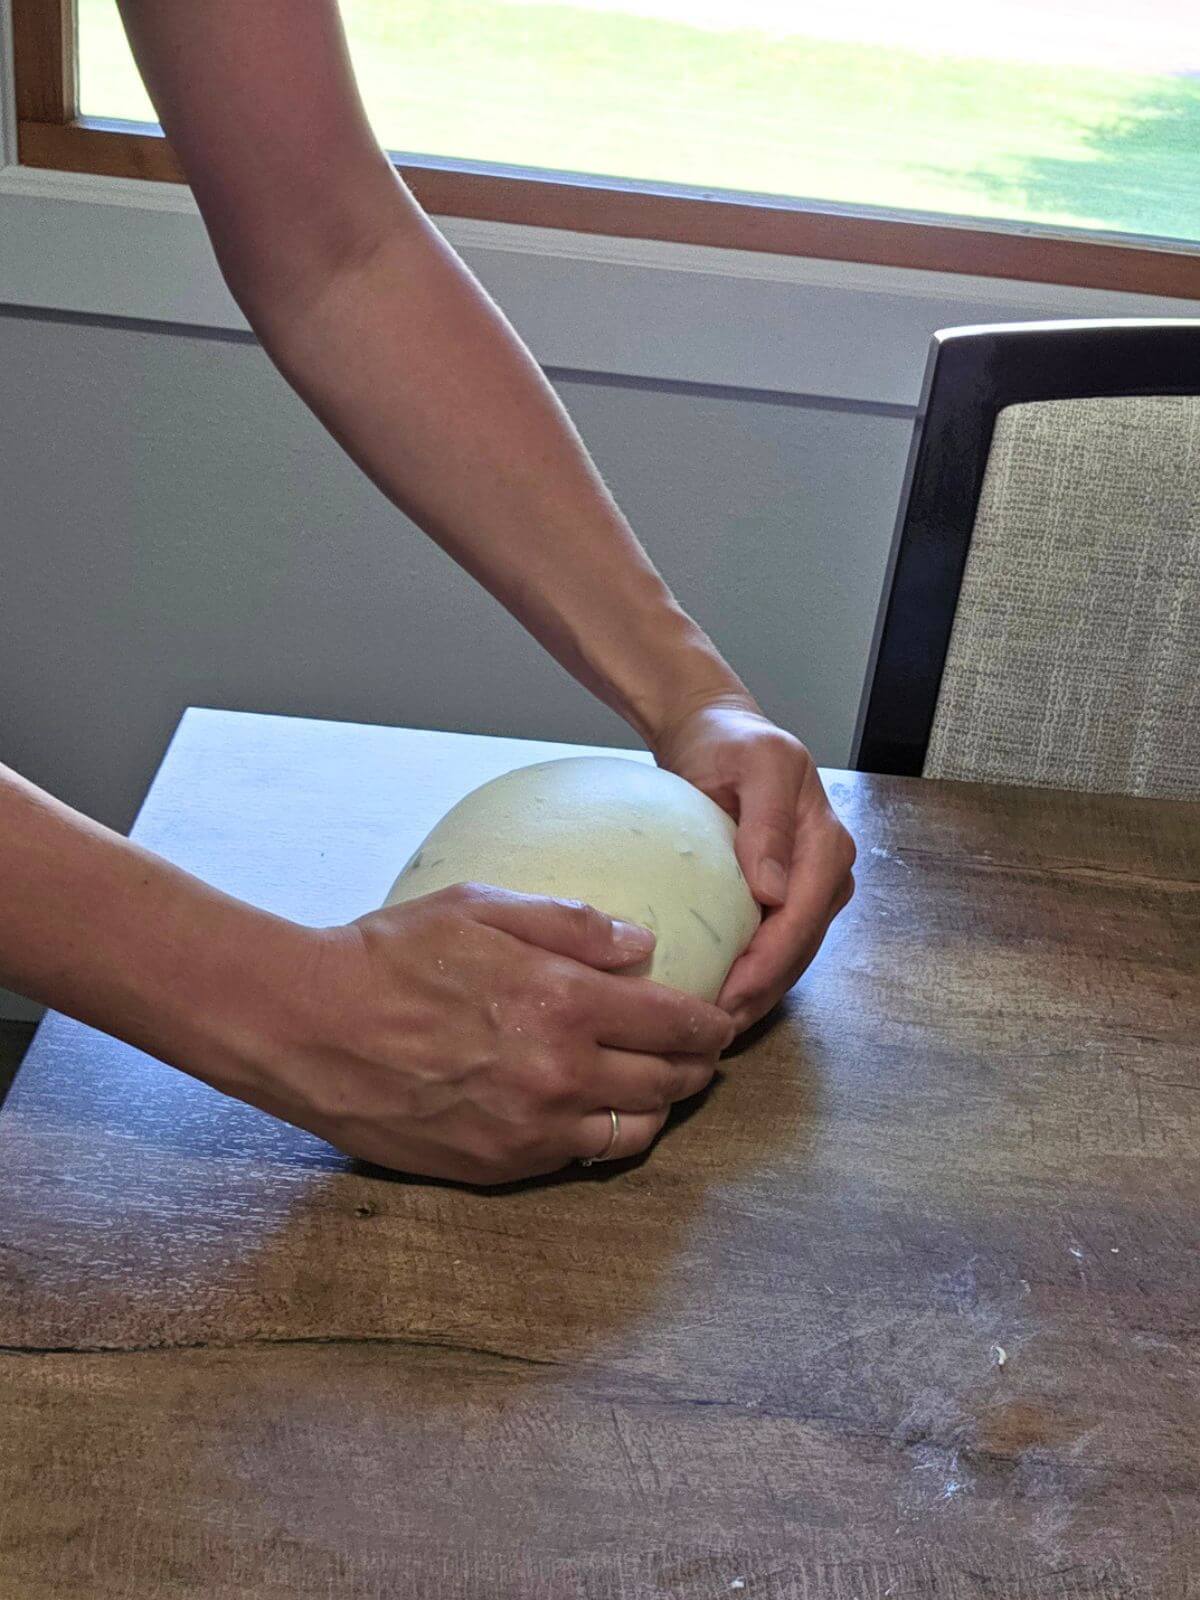
Step 4: Turn the dough out onto a lightly floured surface and shape it into a round loaf. Use your hands or a bench scraper to build tension on the outside of the dough.
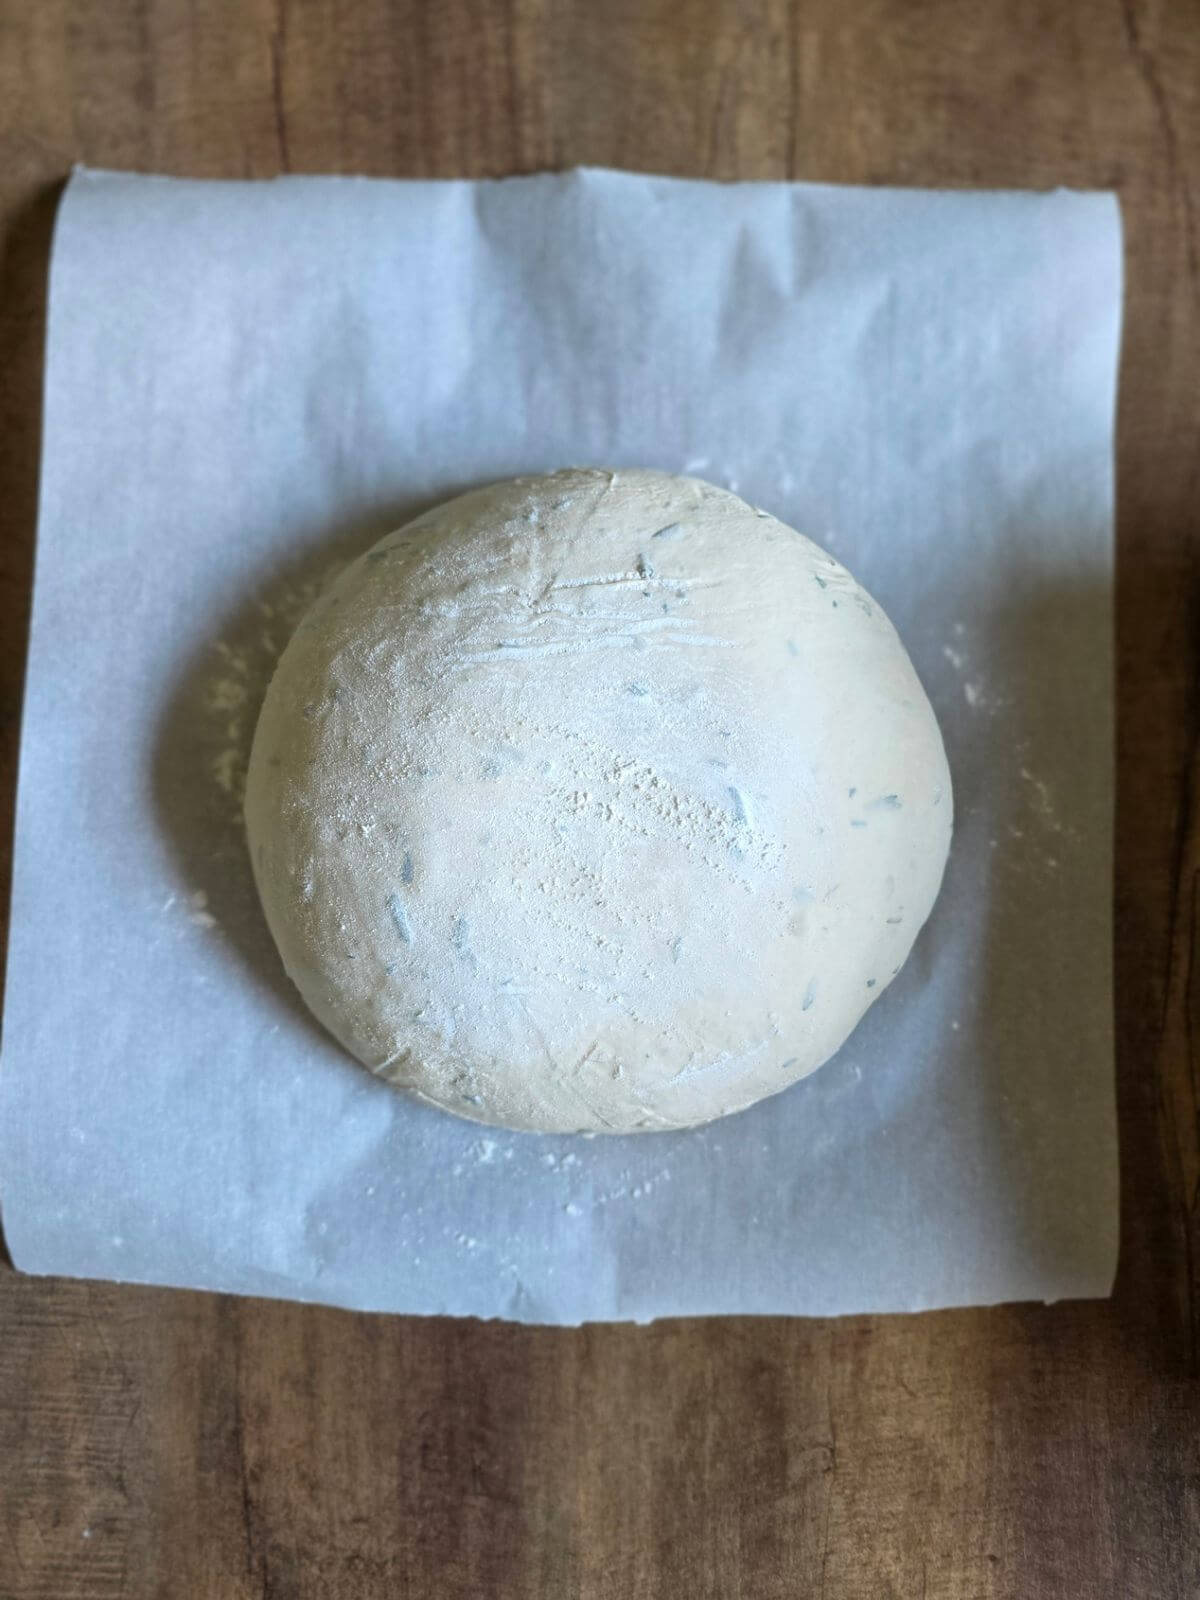
Step 5: Place the shaped loaf onto a piece of parchment paper. Lightly flour the top if needed before scoring.
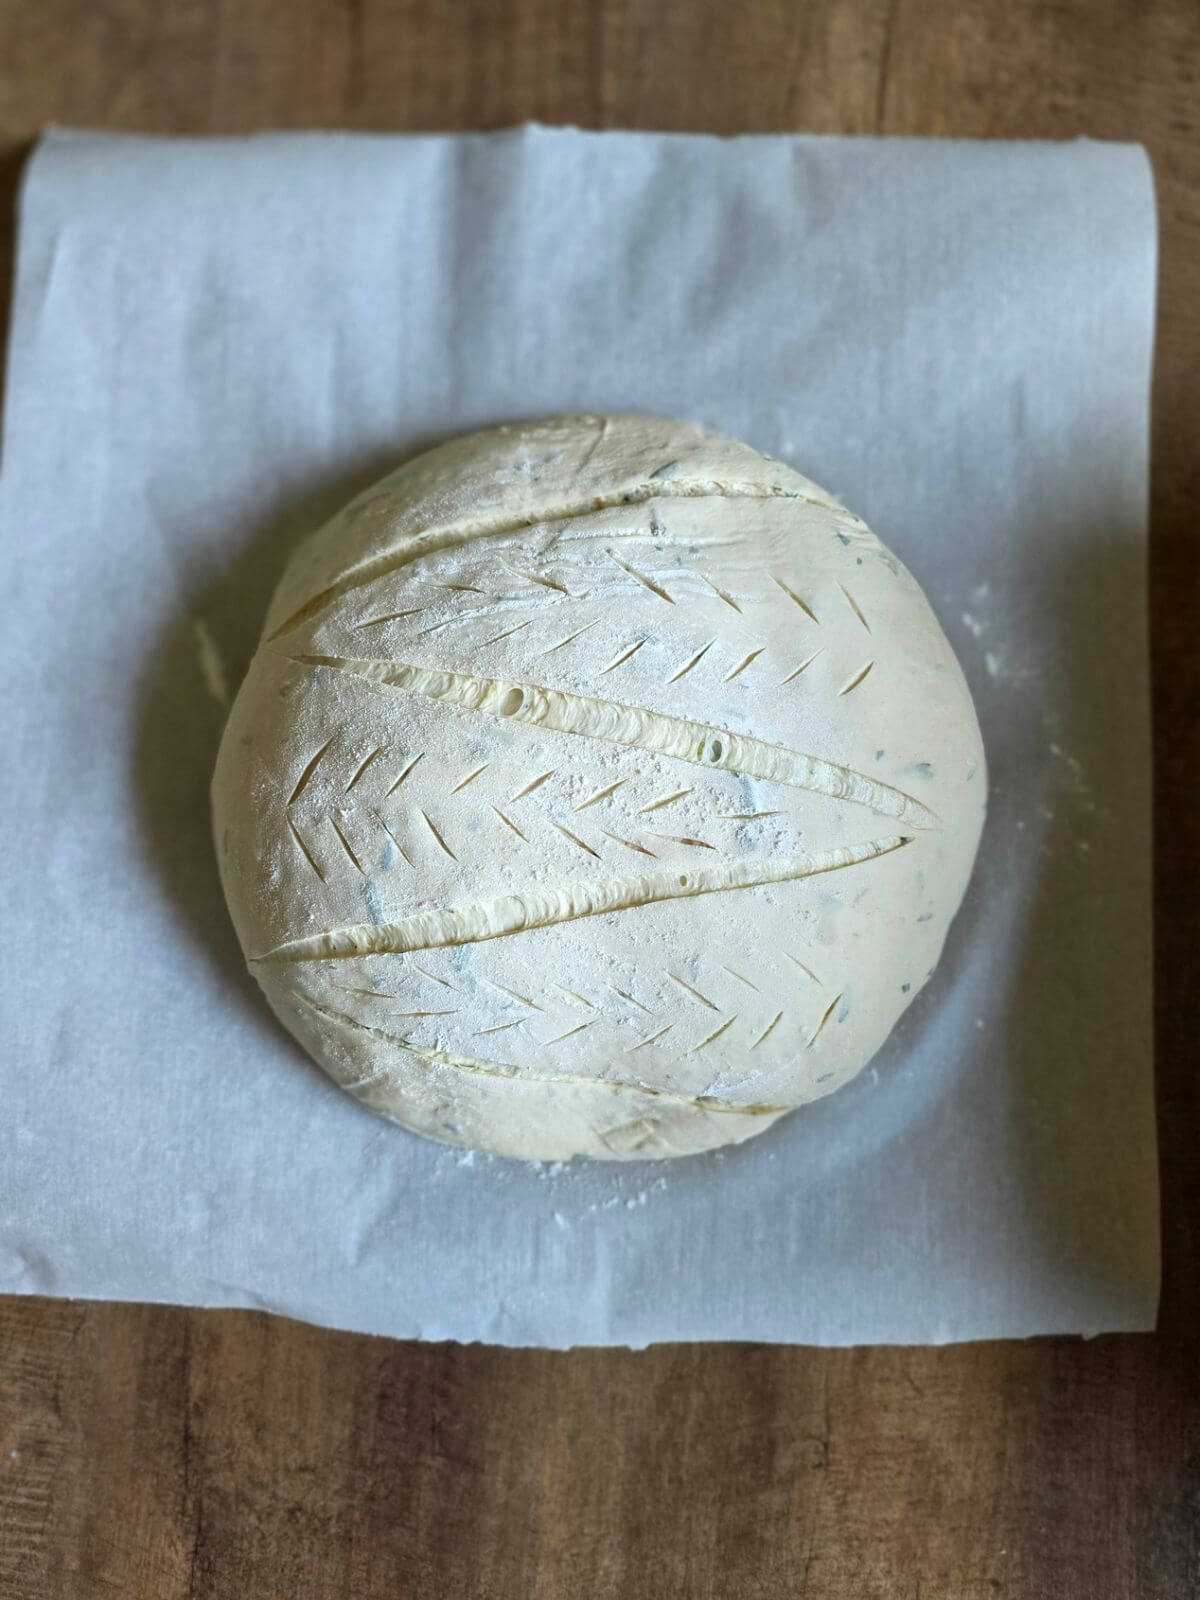
Step 6: Use a sharp lame or knife to score the top of the dough.
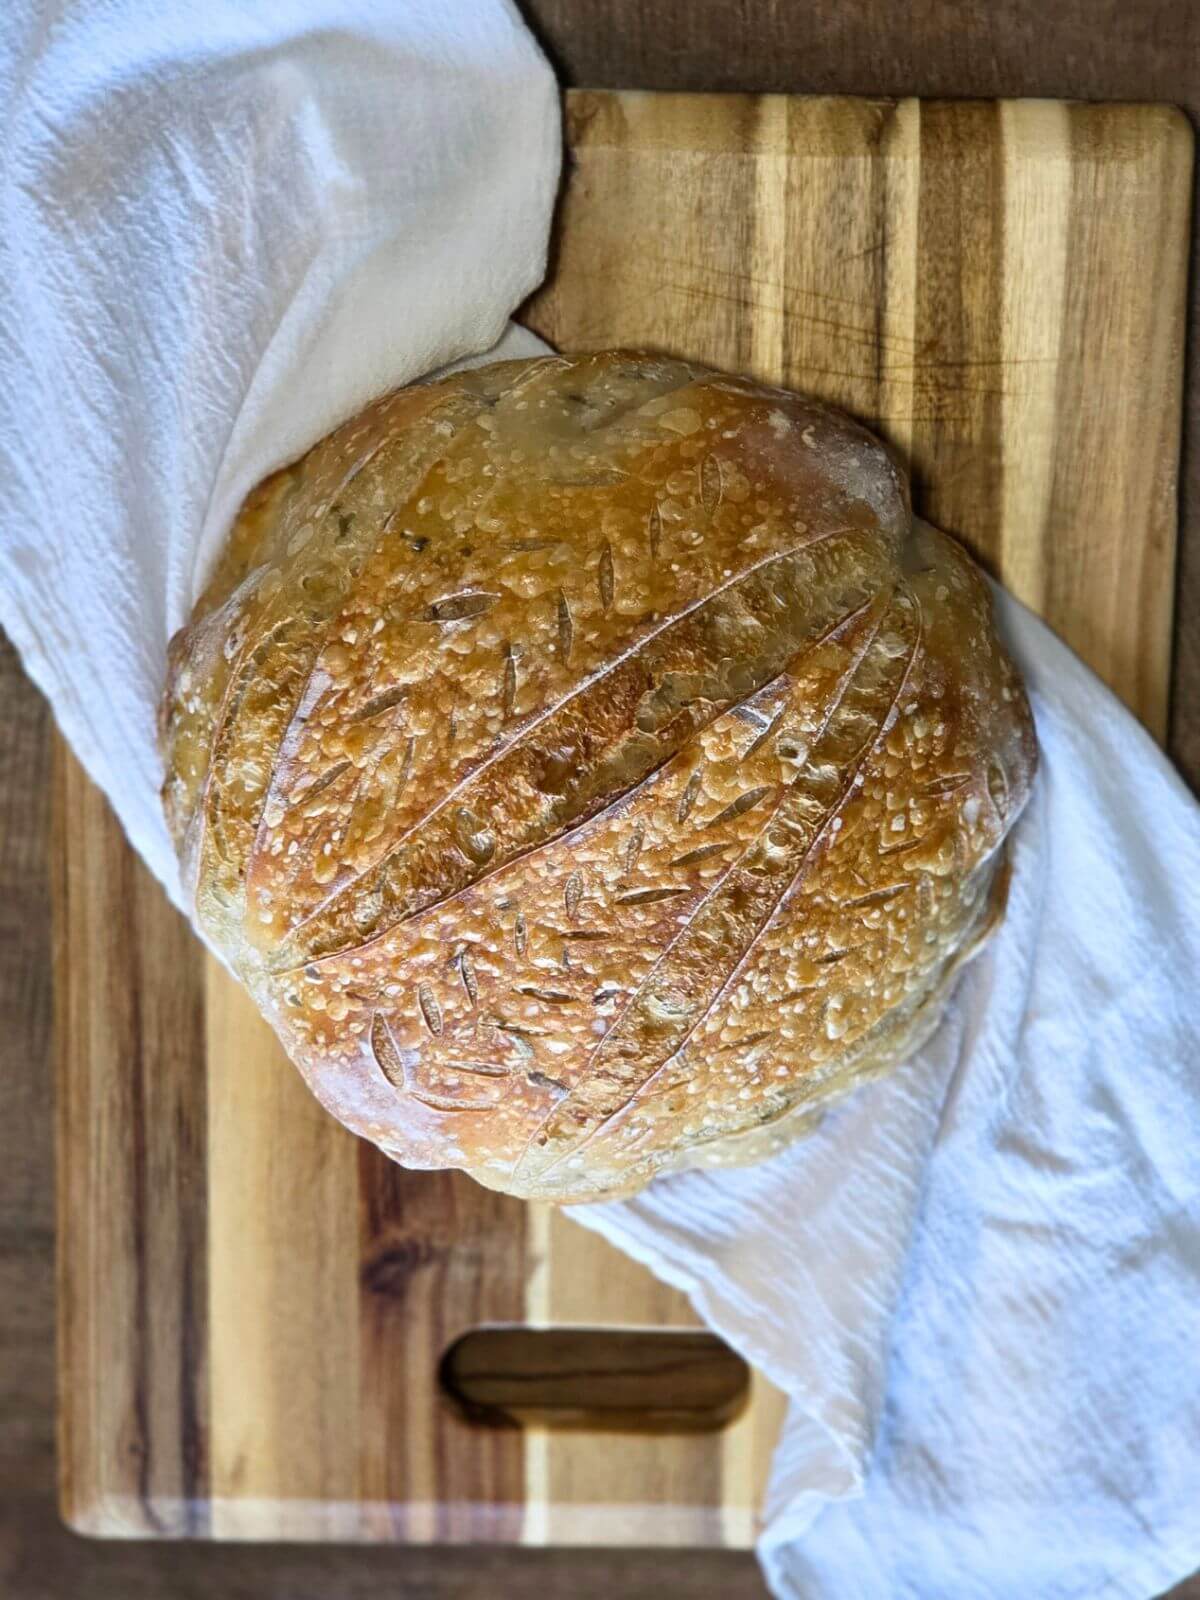
Step 7: Bake the rosemary sourdough bread until the crust is deep golden brown and crisp. Let the loaf cool before slicing so the inside can finish setting.
Step 8: Let the loaf cool before slicing so the inside can finish setting.
See the recipe card below for the full ingredient amounts, timing, temperature, and detailed step by step directions.
Baker’s Schedule Example
9:00 pm, the night before:
Feed your sourdough starter with flour and water. Depending on how active your starter is and how warm your kitchen is, it may take 4 to 12 hours to become bubbly and ready to use.
7:00 am:
If your starter is active and bubbly, mix the dough. Roast the garlic and chop the rosemary while the dough rests.
7:30 am:
Add the cooled roasted garlic and fresh rosemary, then begin your stretch and folds. Do one set every 30 minutes, keeping the dough covered with a damp towel between each set.
After stretch and folds:
Let the dough bulk ferment until it looks puffy, has visible bubbles, and has risen about 50 to 75 percent. It does not need to fully double.
Evening, around 6:00 to 8:00 pm:
Shape the dough once it has finished bulk fermenting. The timing may be sooner or later depending on the temperature of your kitchen and the strength of your starter.
After shaping:
Transfer the shaped dough to a floured banneton or a bowl lined with a floured tea towel. Cover with plastic wrap or a bag and place it in the refrigerator for at least 1 hour or up to 48 hours.
9:00 am, the next day:
Preheat the oven to 450°F with your Dutch oven inside. Take the dough out of the fridge, turn it onto parchment paper, dust with flour if desired, and score the top.
9:30 am:
Bake the sourdough bread until the crust is golden and crisp. Let it cool before slicing so the crumb can finish setting.
Roasted Garlic and Rosemary Sourdough Bread FAQ's
Store rosemary sourdough bread at room temperature in a bread bag, paper bag, or loosely wrapped in a towel for 2 to 3 days. For longer storage, slice and freeze it.
Yes, you can use dried rosemary, but fresh rosemary gives the bread the best flavor. If using dried rosemary, use less since dried herbs are stronger than fresh.
Rosemary sourdough bread can turn out gummy if it is underbaked, sliced too soon, or overproofed. Let the loaf cool fully before slicing so the crumb can finish setting.
Yes. A Dutch oven gives the best crust, but you can bake the bread on a preheated baking stone or sheet pan and add steam to the oven with a pan of hot water.
Recipes to Make with This Bread
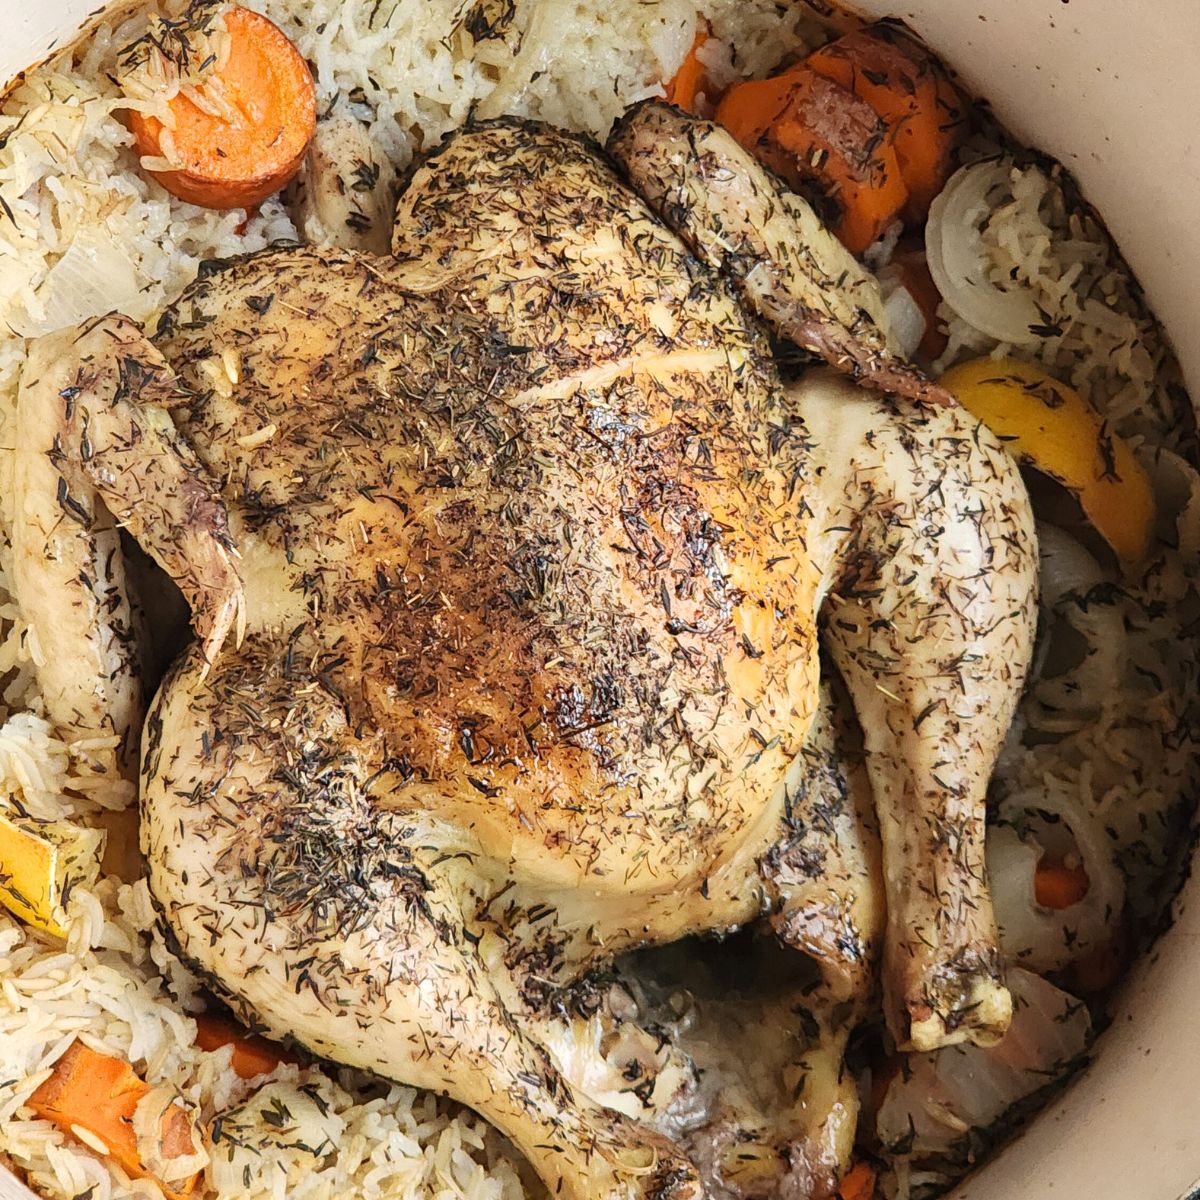
Looking for dinner ideas to serve with this bread? These recipes pair well with a savory rosemary sourdough loaf:


If you tried this Roasted garlic and Rosemary Sourdough Bread or any other recipe on my website, please leave a 🌟 star rating and let me know how it went in the 📝 comments below. I love hearing from you!

Roasted Garlic and Rosemary Sourdough Bread
Equipment
- Dutch oven
- proofing basket
- large bowl
Ingredients
For the roasted garlic:
- 1 whole head garlic
- 1 teaspoon olive oil
- Pinch of salt
For the sourdough bread:
- 100 grams active sourdough starter
- 350 grams warm water
- 500 grams bread flour
- 10 grams salt
- 1 to 2 tablespoons fresh rosemary finely chopped
- Roasted garlic cloves cooled
Instructions
- Preheat the oven to 400°F. Slice the top off the head of garlic to expose the cloves. Drizzle with olive oil and sprinkle with a pinch of salt. Wrap in foil and roast for 35 to 45 minutes, or until the cloves are soft and golden. Let cool, then squeeze the cloves out of the skins.
- In a large bowl, mix the active sourdough starter and warm water until mostly combined. Add the flour and salt, then mix until a shaggy dough forms. Cover and let the dough rest for 30 minutes.
- Add the cooled roasted garlic and chopped rosemary to the dough. Gently fold them in during the first set of stretch and folds.
- Complete 3 to 4 sets of stretch and folds, spaced about 30 minutes apart. Keep the dough covered between each set.
- Let the dough bulk ferment at room temperature until it looks puffy, has visible bubbles, and has risen about 50 to 75 percent. This may take several hours depending on the warmth of your kitchen and the strength of your starter.
- Turn the dough out onto a lightly floured surface. Shape it into a round loaf, building tension on the outside of the dough.
- Place the shaped dough seam side up in a floured banneton or a bowl lined with a floured tea towel. Cover and refrigerate for at least 1 hour or up to 48 hours.
- When ready to bake, place a Dutch oven in the oven and preheat to 450°F.
- Turn the chilled dough out onto parchment paper. Dust with flour if desired, then score the top with a sharp lame or knife.
- Carefully place the dough into the hot Dutch oven. Cover and bake for 30 minutes. Remove the lid and bake for another 15 to 25 minutes, or until the crust is deep golden brown and crisp.
- Transfer the bread to a wire rack and let it cool completely before slicing.
Notes
- Use an active, bubbly sourdough starter that is at or near peak before mixing the dough. This helps the bread rise well and keeps the crumb from turning dense.
- Use unbleached flour for the best sourdough results. It usually ferments better and gives the loaf better structure.
- Filtered water is best, especially if your tap water is heavily treated. Chlorine can slow down sourdough fermentation and make your starter or dough less active.
- Watch the dough more than the clock. Bulk fermentation depends on the warmth of your kitchen and the strength of your starter. Look for dough that is puffy, bubbly, and risen about 50 to 75 percent.


The roasted garlic makes this loaf so flavorful, especially when it’s folded in early with the rosemary. Such a good savory sourdough bread for soup nights or dinner.
Is there a second rise to double dough?
Bc after the first rise and you transfer to a different bowl, then you say to put it in the fridge. Is the second rise in the fridge?
Yes. It doesn't rise much during the second ferment. It rises while baking 🙂
How much dried rosemary?
I would do 2 tbsp as well.